Welcome back to Day 2 of our Computer Basics training series! In our previous sessions, we learned about the main hardware components of a computer and how to safely turn the system on and off. Today, we will focus entirely on your two main tools for interacting with the computer: the Mouse and the Keyboard.
1. Mastering the Computer Mouse
The mouse is your hand’s extension on the screen. It controls the pointer (cursor). Here are the core actions you need to master:
- Left-Click: Press the left button once. Used to select items, click buttons, or place the cursor in text.
- Double-Click: Click the left button twice quickly. Used to open files, folders, or programs.
- Right-Click: Press the right button once. Opens a “context menu” with options and shortcuts related to whatever you clicked on.
- Scroll Wheel: Spin the wheel up or down using your middle finger. Used to move up and down through long web pages or documents.
- Drag and Drop: Click and hold the left button down on an item, move the mouse to a new location, and then release the button. Used to move or rearrange icons and files.
2. Getting Comfortable with the Keyboard
The keyboard is used to type text and give commands. A standard keyboard is divided into a few key sections:
I. Alphabet Keys (A-Z) & Number Keys (0-9)
- Located in the center and top, used for everyday typing of words and numbers.
II. Special Function Keys
- Enter Key: Moves you to a new line when typing, or confirms/submits commands.
- Backspace & Delete: Backspace erases text to the left of the cursor; Delete erases text to the right.
- Spacebar: Adds a space between words (the longest key at the bottom).
- Shift Key: Held down with another key to type capital letters or the symbols printed on the upper half of number keys (like
@,#,$). - Caps Lock: Press once to type all capital letters until turned off.
3. Essential Keyboard Shortcuts for Beginners
Shortcuts save you time and make your computer work smoother:
Ctrl + C: Copy selected text or files.Ctrl + V: Paste what you copied.Ctrl + Z: Undo your last action (lifesaver if you make a mistake!).Ctrl + S: Save your current work or document.
Basic information
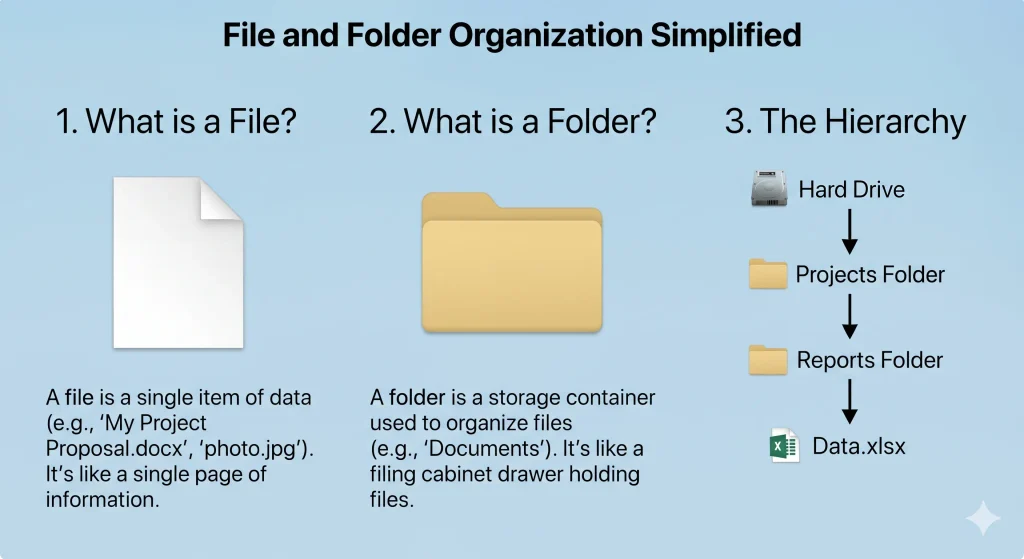
1. Understanding Files and Folders
Before we start organizing, let’s understand what we are working with.
- What is a File? A file is a single item of information that is saved on your computer. It could be a document (like a letter or resume), an image (photo), a song, or a video. Every file has a name and a specific type, often indicated by a three-letter extension (e.g.,
document.docx,photo.jpg,song.mp3). - What is a Folder? A folder is a container used to store and organize your files. Just like a physical manila folder holds paper documents, a digital folder holds digital files. You can even put folders inside other folders (this is called creating a hierarchy).
2. How to Create New Folders
Keeping your files organized starts with creating clear, logical folders. Here’s how to do it in Windows:
- Navigate to the Location: Open “File Explorer” (the folder icon on your taskbar) and go to the place where you want to create the new folder (e.g., inside the
Documentsfolder or on theDesktop). - Right-Click: In an empty space within the folder or on the Desktop, right-click with your mouse.
- Select New > Folder: A menu will appear. Hover your mouse over “New” and then click on “Folder”.
- Name Your Folder: A new folder will appear with the temporary name “New Folder” highlighted in blue. Immediately type a new, descriptive name for your folder (e.g.,
My Projects,Family Photos,Invoices 2024). - Press Enter: Press the Enter key on your keyboard to save the new name.
3. Basic File Management Actions
Now that you have folders, you need to know how to move your files into them.
I. How to Move a File (Cut and Paste Method)
This is the most common way to move a file from one location to another.
- Select the File: Find the file you want to move.
- Cut the File: Right-click on the file and select Cut (the scissors icon). The file icon will appear slightly faded.
- Go to the New Folder: Navigate to the destination folder where you want the file to go.
- Paste the File: Right-click anywhere empty inside the new folder and select Paste (the clipboard icon). The file will now move from the old location to the new one.
II. How to Copy a File (Copy and Paste Method)
Use this method if you want to keep the original file in its current location and also have a duplicate of it in another folder.
- Select the File: Find the file you want to copy.
- Copy the File: Right-click on the file and select Copy (the two overlapping pages icon).
- Go to the New Folder: Navigate to the destination folder.
- Paste the File: Right-click anywhere empty inside the new folder and select Paste (the clipboard icon). A duplicate of the file will appear in the new location.
III. How to Delete a File
If you no longer need a file, you can delete it.
- Select the File: Find the file you want to delete.
- Delete the File: Press the Delete key on your keyboard or right-click the file and select Delete (the trash can icon).
- Important Note: Most deleted files go to the Recycle Bin on your Desktop. If you accidentally delete something, you can open the Recycle Bin, right-click the file, and select “Restore” to put it back. To permanently delete a file (and free up space), you must empty the Recycle Bin.